In this step of the tutorial you learn how to add resources to a localization table, how to prepare the text content in your Kanzi application for the translators, and how to add the translated text content to your Kanzi application. You also learn how to create a trigger to change locales.
Assets for this tutorial
The assets you use in this tutorial are stored in <KanziWorkspace>/Tutorials/Localization/Assets:
Fonts directory contains the fonts that include the Japanese and Chinese glyphs.
Project directory contains a Kanzi Studio project that is the starting point for this tutorial.
Text directory contains the .po files that contain the translated text content of the starting point project.
<KanziWorkspace>/Tutorials/Localization/Completed directory contains the completed Kanzi Studio project of this tutorial.
Add resources to a localization table and import the translations
To add resources to a localization table and import the translations:
Open the Kanzi Studio project located in <KanziWorkspace>/Tutorials/Localization/Assets/Project/Tool_projects/Localization/Localization.kzproj.
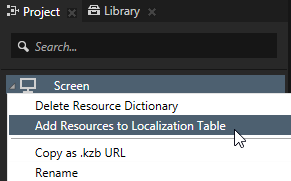
In the Project right-click the Screen node and in the context menu select Add Resources to Localization Table. When you use the Add Resources to Localization Table command on the Screen node, Kanzi Studio enables you to add all resources in your project. To include resources only for the selected node and its tree, right-click that node and select Add Resources to Localization Table.
In the Add Resources to Localization Table window set:
Localization Table to the localization table to which you want to add the resources. If you do not have a localization table yet, select <Create localization table ...>. Localization table contains the information about which locale uses which resources.
In the top right part of the window you can select which types of resources you want to show in the window. By default Kanzi shows the text resources in the project. In this step of the tutorial you localize only the text resources. You localize other types of resources in the next step.
Click Select All to select all listed resources. Use the checkbox next to each resource to select that resource. To select or deselect all resources use the buttons in the bottom left part of the window.
Click Add.
Kanzi Studio creates resources and resource IDs from all resource types you selected and adds them to the localization table you selected. You can find the localization tables in the Library > Localization. You can now localize resources and in the localization table set which resource you want to use for which locale.
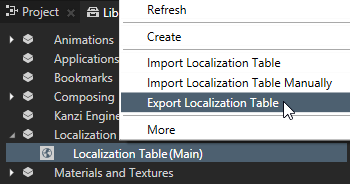
In the Library > Localization right-click the localization table Localization Table (Main) and select Export Localization Table. Kanzi Studio exports the localization table template to a .pot file format to the <ProjectName>/Localization/<LocalizationTableName> directory. When you localize your Kanzi application for the first time, send the .pot file to the translators. This is the template file that contains strings and their context for each text resource in the localization table. Translators use the .pot template file to translate the text content for each locale. Result of their translation is one .po file for each locale. For this tutorial you can find the translated .po files with Finnish (fi-FI locale) and German (de-DE locale) translations in the <KanziWorkspace>/Tutorials/Localization/Assets/Text directory. There you can also find the translated .po files for the Japanese and Chinese locales which you add as locale packs in the last step of this tutorial.
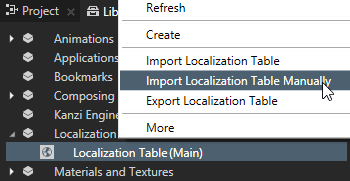
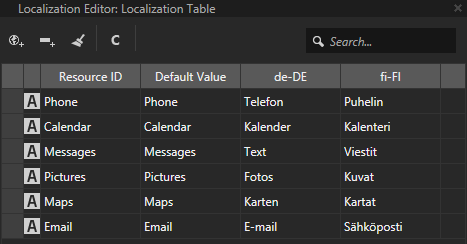
In the Library > Localization right-click the localization table you exported, select Import Localization Table Manually, go to <KanziWorkspace>/Tutorials/Localization/Assets/Text, and import the .po files for the fi-FI and de-DE locales. Kanzi Studio creates the locales specified in each .po file and adds the translations from the .po files to the localization table. Kanzi uses localization tables to store the localized text resources and information about which locale uses which project resources. Double-click the localization table to open it and see the resources in the localization table.
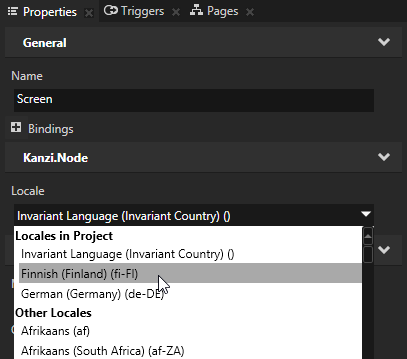
(Optional) If you want to immediately see how each of the locales work in Kanzi Studio, in the Project select the Screen node, and in the properties set the Locale property to the locale you want to see in the Preview.
Create triggers to change locales
You can change the locale in your Kanzi application by setting the value of the Locale property in the Screen node. In this section you create buttons and use triggers to change the application locale.
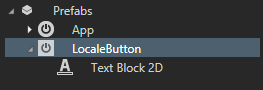
In the Project > Prefabs create a prefab for the locale selection button:
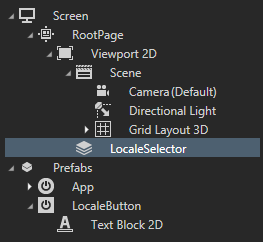
Create a Button 2D node and name it LocaleButton, and under it a Text Block 2D node. You use the trigger in the Button 2D to set the locale and the Text Block 2D node to show the name of the locale.
In the Project > Prefabs select the Button 2D node and in the Properties click , add the Vertical Margin property, and set the Bottom attribute to 10. You use the Vertical Margin property to separate the buttons by 10 pixels when they are presented in a Stack Layout 2D node.
In the Project > Prefabs select the Text Block 2D node and in the Properties next to the Text property click , and name the property LocaleName. This enables you to display a different text for each instance of the prefab. A prefab can contain a tree of nodes, each with their own properties. When you edit the nodes in a prefab or its instance, you change those nodes in all instances of that prefab. However, you can customize individual instances of the prefab to have individual values by overriding the values in the default prefab. For example, when you create a prefab for an address book entry you want to show a different name, number, and photo for each address book entry. When you click Kanzi Studio creates from that property a custom property, adds it to the root of the prefab, and creates a binding to the property in the prefab root. That way you can set in the root of the prefab instance the text you want the Text Block 2D node to show. You use this Text Block 2D node to show the name of the locale in the application.
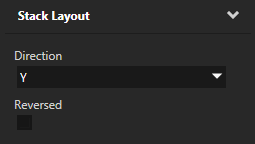
In the Projectpress Alt and right-click the Viewport 2D node, select Stack Layout 2D node, name it LocaleSelector, and in the Properties set the Direction property to Y. You use the Stack Layout 2D node to list the instances of the prefab you created earlier to change the application locale.
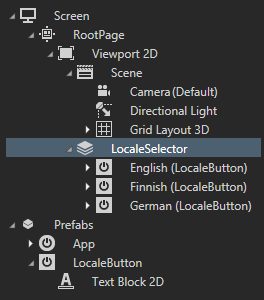
In the Project drag from the Prefabs to the LocaleSelector node as many LocaleButton prefabs as you have locales.
In the Project select each instance of the LocaleButton prefab in the LocaleSelector node, press F2 and name each after the locale it sets.
Select an instance of the LocaleButton prefab in the LocaleSelector node and set:
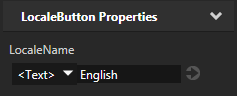
In the Properties add the LocaleName property and set its value to the locale this instance of the prefab represents. This text you enter for the locale name is used in your Kanzi application. For example, for the default locale set the value to English.
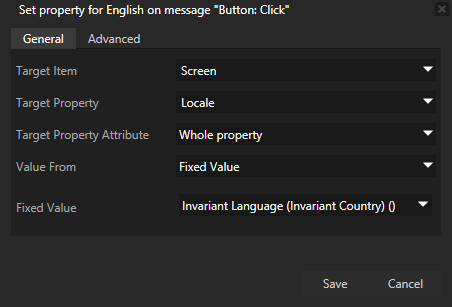
In the Triggers add the Button: Click trigger, add the Set Property Value action and set:
Target Item to Screen
Target Property to Locale
Value From to Fixed Value
Fixed Value to the locale you want to set with this button. For example, to set to default locale, in this case English, select the Invariant Language (Invariant Country) () value.
Click Save.
Repeat the previous step for each locale:
For the Finnish locale set the LocaleName property to suomi and in the Set Property Value action set the Fixed Value property to Finnish (Finland) (fi-FI).
For the German locale set the LocaleName property to Deutsch and in the Set Property Value action set the Fixed Value property to German (Germany) (de-DE).
In the Preview when you click the locale name, Kanzi Studio changes the text in the Kanzi application to that locale.
 in the project.
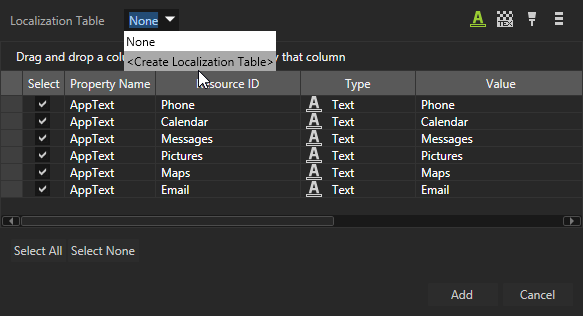
 , add the
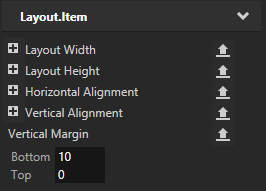
 , and name the property